
Dreamy Strawberry Red Velvet Cheesecake Recipe: Sweet Bliss!
Sweet, decadent strawberry red velvet cheesecake beckons with irresistible charm.
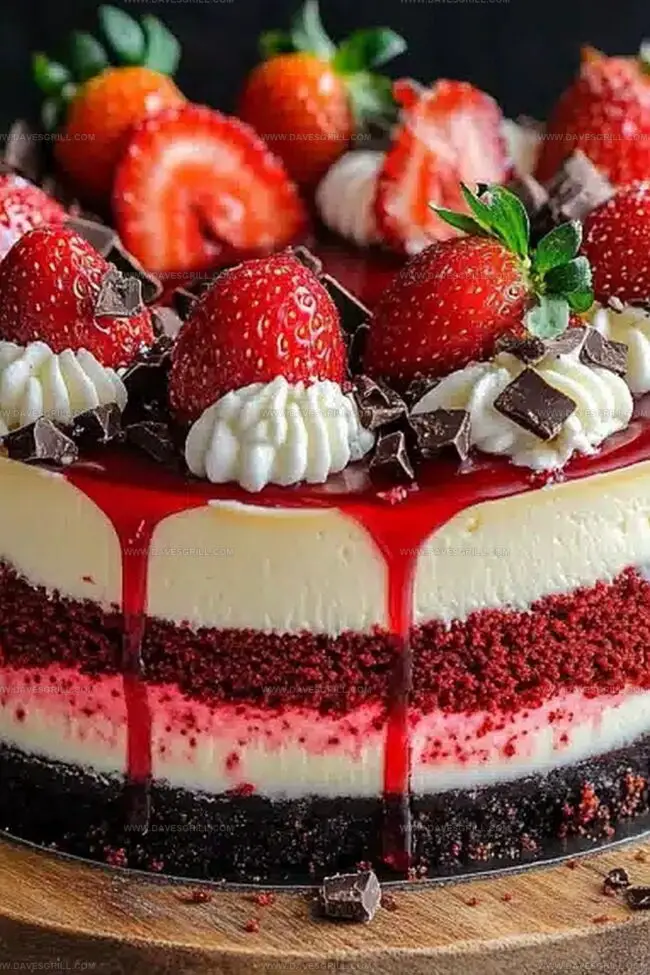
This heavenly dessert blends rich red velvet notes with creamy cheesecake perfection.
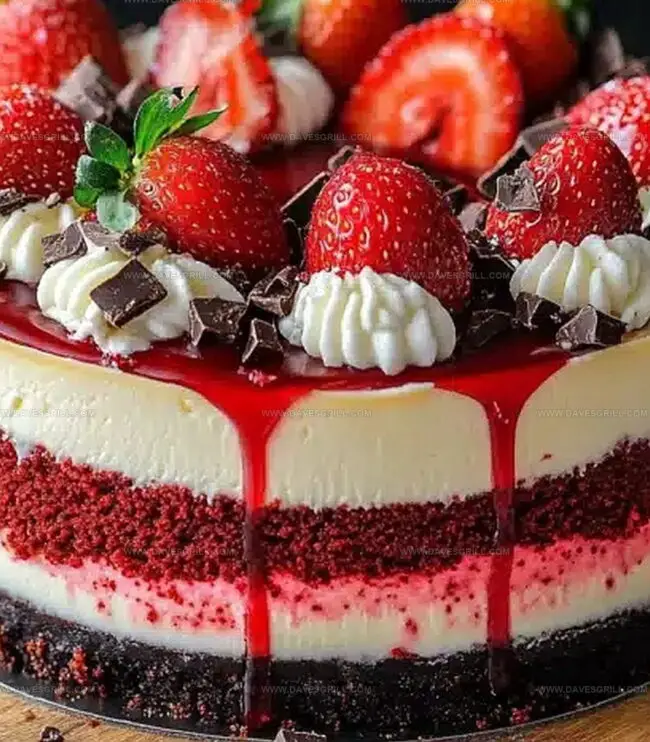
Velvety layers dance between deep crimson cake and silky smooth cream cheese filling.
Ripe strawberries add a burst of fresh, tangy brightness to each delightful bite.
Elegant yet simple, this showstopping dessert promises to dazzle at any gathering.
Professional bakers and home cooks alike will adore the stunning presentation.
Prepare to indulge in a dessert that feels like pure culinary magic.
Quick Recipe Overview
Strawberry Red Velvet Cheesecake Ingredient Rundown
For Cake Base:For Liquid Ingredients:For Cheesecake Layer:For Strawberry Topping:Tools to Create That Cheesecake-Layered Look
Bake a Cheesecake with Red Velvet Richness
Mix dry ingredients in a bowl. Whisk wet ingredients separately. Combine gently without overmixing. Pour batter into greased cake pans. Bake until a toothpick comes out clean. Cool completely.
Beat cream cheese until smooth. Add eggs one by one. Mix in vanilla and sour cream carefully. Pour batter into springform pan. Bake at lower temperature. Allow gentle cooling in oven with door cracked open.
Simmer fresh strawberries with sugar in saucepan. Cook until sauce thickens and becomes glossy. Let sauce cool completely before using.
Place first cake layer on serving plate. Add cheesecake layer on top. Crown with second cake layer. Drizzle strawberry sauce over cake, letting it cascade down sides artistically.
Refrigerate cake for several hours. Slice when thoroughly chilled. Enjoy this decadent dessert that blends rich flavors and stunning presentation.
Tips for That Perfect Berry-Cream Texture
Serve This Cheesecake at Special Occasions
Save It Smooth and Satisfying for Days
FAQs
The red food coloring provides the signature vibrant red hue. A small amount of cocoa powder also contributes to the cake’s unique flavor and color profile.
Yes, you can omit the food coloring. The cake will look more brown but will still taste delicious. Some bakers use natural alternatives like beetroot juice for a reddish tint.
Bake the cheesecake in a water bath or gradually cool it in the oven with the door slightly open. Avoid overmixing the batter and sudden temperature changes, which can cause cracks.
A springform pan is recommended as it allows easy removal of the delicate cheesecake without damaging its structure. If you don’t have one, use a well-greased regular cake pan, but removal might be more challenging.
Print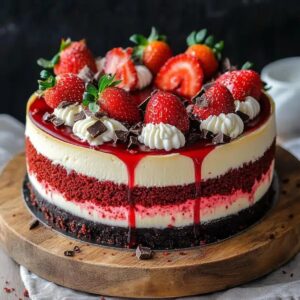
Luscious Strawberry Red Velvet Cheesecake Recipe
- Total Time: 4 hours 30 minutes
- Yield: 9 1x
Description
Luscious Strawberry Red Velvet Cheesecake marries classic dessert traditions with modern pastry artistry. Rich cream cheese layers complement velvety red cake, while fresh strawberry garnishes provide perfect seasonal balance.
Ingredients
- 1 ½ cups (190 g) all-purpose flour
- 1 cup (200 g) granulated sugar
- 16 oz (450 g) cream cheese, softened
- 2 large eggs
- 1 large egg
- 1 cup (240 ml) buttermilk
- ½ cup (120 ml) vegetable oil
- ½ cup (100 g) granulated sugar
- 2 cups (300 g) fresh strawberries, hulled and sliced
- ½ cup (60 ml) sour cream
- 1 tbsp cocoa powder
- 1 tbsp red food coloring
- 1 tbsp white vinegar
- 1 tbsp cornstarch
- 1 tsp baking soda
- 1 tsp vanilla extract
- ½ tsp vanilla extract
- ½ tsp salt
- ¼ cup (50 g) granulated sugar
- ¼ cup (60 ml) water
Instructions
- Cake Preparation: Grease and line two 8-inch round pans with parchment paper, then set oven to 350F (175C). Sift dry ingredients into mixing bowl, combining flour, sugar, cocoa powder, baking soda, and salt.
- Batter Creation: Whisk wet ingredients including buttermilk, oil, egg, vanilla extract, vinegar, and red food coloring. Gently fold wet and dry mixtures until just incorporated, maintaining a smooth consistency.
- Cake Baking: Distribute batter evenly between prepared pans and bake for 20-25 minutes until toothpick comes out clean. Cool layers completely at room temperature.
- Cheesecake Foundation: Reset oven to 325F (160C) and prepare springform pan. Beat cream cheese and sugar until silky, then carefully incorporate eggs, vanilla extract, and sour cream with minimal mixing.
- Cheesecake Baking: Pour batter into prepared pan, smoothing surface. Bake 45-50 minutes until edges set and center remains slightly wobbly. Turn off oven, leave door slightly ajar, and let cheesecake rest for one hour.
- Strawberry Topping: Combine strawberries, sugar, cornstarch, and water in saucepan. Simmer over medium heat, stirring consistently until mixture becomes glossy and thickens (5-7 minutes). Cool completely.
- Final Assembly: Layer first red velvet cake, position cheesecake, top with second cake layer. Spoon cooled strawberry topping over dessert, allowing elegant drips. Refrigerate for minimum 4 hours before serving chilled.
Notes
- Prevent Overmixing: Stir cake batter gently to maintain soft, tender texture and avoid dense, tough layers.
- Control Food Coloring: Use gel-based red food coloring for vibrant color without altering batter consistency.
- Master Cheesecake Baking: Watch for slight wobble in center during baking to prevent dry, cracked surface.
- Temperature Management: Allow gradual cooling to prevent cheesecake from cracking and ensure smooth, creamy texture.
- Prep Time: 30 minutes
- Cook Time: 4 hours
- Category: Desserts
- Method: Baking
- Cuisine: American
Nutrition
- Serving Size: 9
- Calories: 396
- Sugar: 34 g
- Sodium: 246 mg
- Fat: 23 g
- Saturated Fat: 6 g
- Unsaturated Fat: 17 g
- Trans Fat: 0 g
- Carbohydrates: 43 g
- Fiber: 1 g
- Protein: 5 g
- Cholesterol: 83 mg
Emily Lawson
Content Creator & Culinary Specialist
Expertise
Education
Oregon Culinary Institute
Diploma in Culinary Arts
Focus: Emphasis on farm-to-table cooking, sustainable practices, and the fusion of global flavors with traditional grilling methods.
Emily Lawson is the content creator at Daves Grill, turning tasty ideas into clear, easy recipes. Based in Portland, she trained at the Oregon Culinary Institute and loves cooking with fresh, seasonal ingredients, especially grilled veggies and global flavors.
Emily mixes food writing with hands-on cooking to bring you recipes that feel fun, not stressful. Her goal is to make every dish simple, flavorful, and worth coming back to. Together, she and Dave serve up real food, one recipe at a time.