
Enchanting Funfetti Cream Cheese Bars Recipe: Sprinkle Joy!
Sweet celebrations call for sprinkle-packed cream cheese funfetti bars that dance with color and delight.
Soft, creamy cream cheese blends perfectly with buttery cake base to create a dreamy dessert.
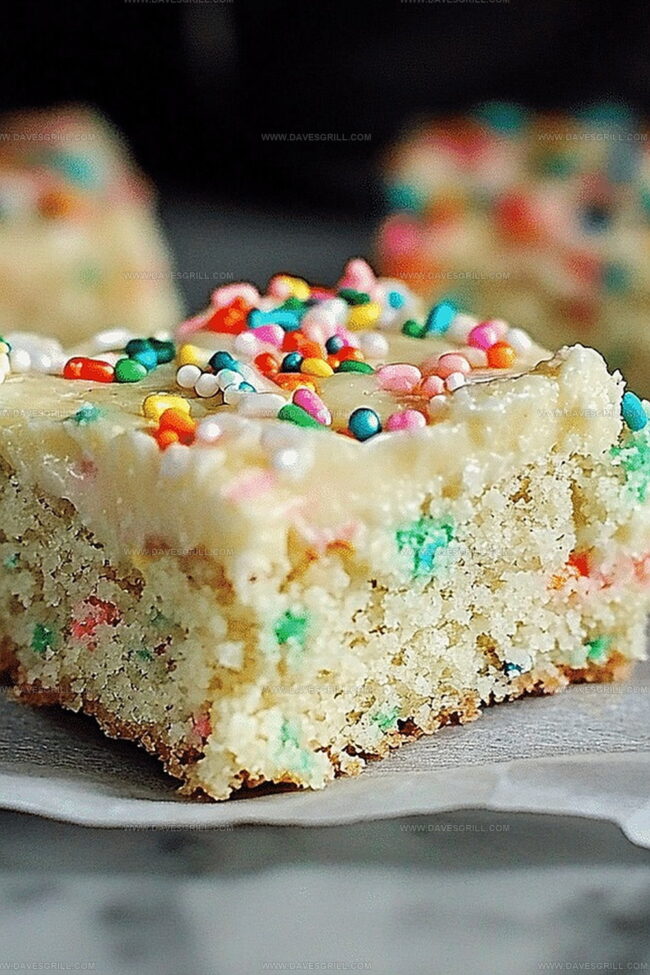
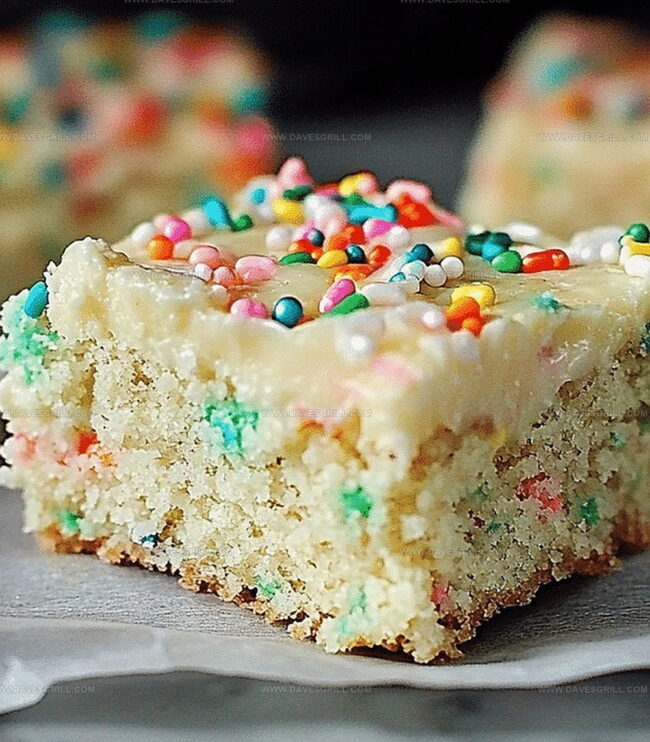
These irresistible bars burst with rainbow confetti, making every bite a festive experience.
Layers of tangy cream cheese and sweet cake meld together in a harmonious treat that screams pure joy.
Simple ingredients transform into a magical dessert that will have everyone asking for seconds.
Rich, tender, and packed with vibrant sprinkles, these bars promise to be the star of any gathering.
Grab a fork and prepare for a delectable journey of pure sugary bliss.
Quick Recipe Overview
Cream Cheese Funfetti Bar Ingredient List
For Cookie Dough Base:For Cream Cheese Filling:For Baking Preparation:Tools for Making Funfetti Bars Flawlessly
Mixing and Baking Funfetti Bars at Home
Grab an 8×8-inch pan and line it with parchment paper, making sure edges hang over for easy lifting. Set your oven to warm up at 350F.
Mix softened butter with white and brown sugars until they become fluffy and light. Crack in an egg and splash of vanilla, stirring until everything blends smoothly. Gently fold in flour, baking soda, and a pinch of salt. Sprinkle in colorful confetti bits for extra fun.
Grab cream cheese and whisk it with powdered sugar and vanilla until super silky and smooth.
Split cookie dough into two portions. Press the first half into the pan’s bottom, creating a solid foundation. Spread cream cheese mixture evenly across this layer. Crumble remaining dough on top, pressing gently to create a playful, textured surface.
Slide the pan into the hot oven. Bake for 25-30 minutes until edges turn golden and center looks set.
Let bars cool completely in the pan. Lift out using parchment edges and slice into squares. Enjoy your colorful, creamy treat!
Flavor Twists to Brighten Up Funfetti Bars
Ideas for Serving Funfetti Bars at Parties
Store and Stack Funfetti Bars Neatly
Print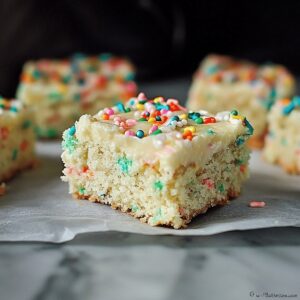
Magical Cream Cheese Funfetti Bars
- Total Time: 45 minutes
- Yield: 17 1x
Description
Funfetti cream cheese bars blend nostalgic birthday cake memories with creamy, tangy elegance. Sweet sprinkles and rich cream cheese create a simple, irresistible dessert perfect for celebrations and weekend treats.
Ingredients
- 8 oz (225 g) cream cheese, softened
- ½ cup (115 g / 4 oz) unsalted butter, softened
- 1 ¼ cups (160 g / 5.6 oz) all-purpose flour
- ½ cup (100 g / 3.5 oz) granulated sugar
- ½ cup (110 g / 3.9 oz) brown sugar, packed
- ½ cup (100 g / 3.5 oz) rainbow sprinkles
- ⅓ cup (40 g / 1.4 oz) powdered sugar
- 1 large egg
- 1 tsp vanilla extract
- 1 tsp vanilla extract
- ½ tsp baking soda
- ¼ tsp salt
Instructions
- Preparation: Line a rectangular baking pan with parchment paper, extending over the edges for easy removal. Preheat the oven to 350F (175C).
- Cookie Base: Cream butter with granulated and brown sugars until light and fluffy. Mix in egg and vanilla extract until well incorporated. Gradually blend in flour, baking soda, and salt. Gently fold in sprinkles, creating a vibrant dough.
- Cream Cheese Filling: Whip cream cheese with powdered sugar and vanilla extract until smooth and creamy, ensuring no lumps remain.
- Assembly: Divide the cookie dough in half. Press one portion evenly across the bottom of the prepared pan. Spread the cream cheese mixture uniformly over the base layer. Crumble the remaining dough on top, lightly pressing to create a rustic covering.
- Baking: Slide the pan into the preheated oven and bake for 25-30 minutes. Look for golden-brown edges and a set center, indicating perfect doneness.
- Cooling and Serving: Remove from oven and allow to cool completely in the pan. Once cooled, lift out using parchment paper edges. Slice into bars of desired size. Store any leftovers in a sealed container in the refrigerator for maximum freshness.
Notes
- Soften Ingredients Perfectly: Allow butter and cream cheese to reach room temperature for 30-45 minutes before mixing, ensuring smooth blending and preventing lumpy textures.
- Control Sprinkle Distribution: Gently fold sprinkles into dough to prevent color bleeding and maintain vibrant, distinct confetti appearance throughout the bars.
- Prevent Overbaking Disaster: Watch edges closely during baking; golden brown indicates doneness while avoiding dry, crumbly texture – remove when center looks slightly soft but set.
- Refrigeration Magic: Chill bars for 1-2 hours before cutting to achieve clean, precise slices and enhance flavor melding between cream cheese and cookie layers.
- Prep Time: 15 minutes
- Cook Time: 30 minutes
- Category: Desserts, Snacks
- Method: Baking
- Cuisine: American
Nutrition
- Serving Size: 17
- Calories: 211
- Sugar: 16 g
- Sodium: 104 mg
- Fat: 10 g
- Saturated Fat: 6 g
- Unsaturated Fat: 4 g
- Trans Fat: 0 g
- Carbohydrates: 27 g
- Fiber: 0.5 g
- Protein: 2.5 g
- Cholesterol: 36 mg
Emily Lawson
Content Creator & Culinary Specialist
Expertise
Education
Oregon Culinary Institute
Diploma in Culinary Arts
Focus: Emphasis on farm-to-table cooking, sustainable practices, and the fusion of global flavors with traditional grilling methods.
Emily Lawson is the content creator at Daves Grill, turning tasty ideas into clear, easy recipes. Based in Portland, she trained at the Oregon Culinary Institute and loves cooking with fresh, seasonal ingredients, especially grilled veggies and global flavors.
Emily mixes food writing with hands-on cooking to bring you recipes that feel fun, not stressful. Her goal is to make every dish simple, flavorful, and worth coming back to. Together, she and Dave serve up real food, one recipe at a time.