
Mom’s Sweet Magic: Classic Banana Pudding Recipe
What happens when classic southern banana pudding meets pure comfort in a creamy, nostalgic dessert that whispers childhood memories?
My grandmother’s cherished banana pudding recipe carries stories of warm kitchen gatherings and sweet southern traditions.
Every spoonful tells a delicious tale of rich, velvety custard layered between ripe banana slices and crisp vanilla wafers.
The magic starts with simple ingredients that blend into something extraordinary and deeply satisfying.
Folks around the table will lean in, anticipating each delightful bite of this timeless treat.
Grab your favorite baking dish and prepare to create a dessert that connects generations through pure, sweet love.
You won’t be able to resist diving into this irresistible southern classic.
Why Mamas Banana Pudding Brings Back Memories
What You Need For Mamas Banana Pudding
Base Ingredients:Layering Ingredients:Optional Garnish:Steps To Make Mamas Banana Pudding

Step 1: Whip Up Pudding Base
In a spacious mixing bowl, blend pudding mix with chilled milk. Whisk energetically until the mixture transforms into a silky smooth consistency. Allow the mixture to rest for 5 minutes, giving it time to thicken and develop its creamy texture.
Step 2: Enhance Pudding Flavor
Pour sweetened condensed milk and vanilla extract into the pudding. Stir thoroughly until all ingredients merge into a luscious, fragrant blend.
Step 3: Fold In Creamy Clouds
Gently incorporate about two-thirds of the whipped topping into the pudding. Use a soft folding motion to maintain the airy, light texture.
Step 4: Create Delightful Layers
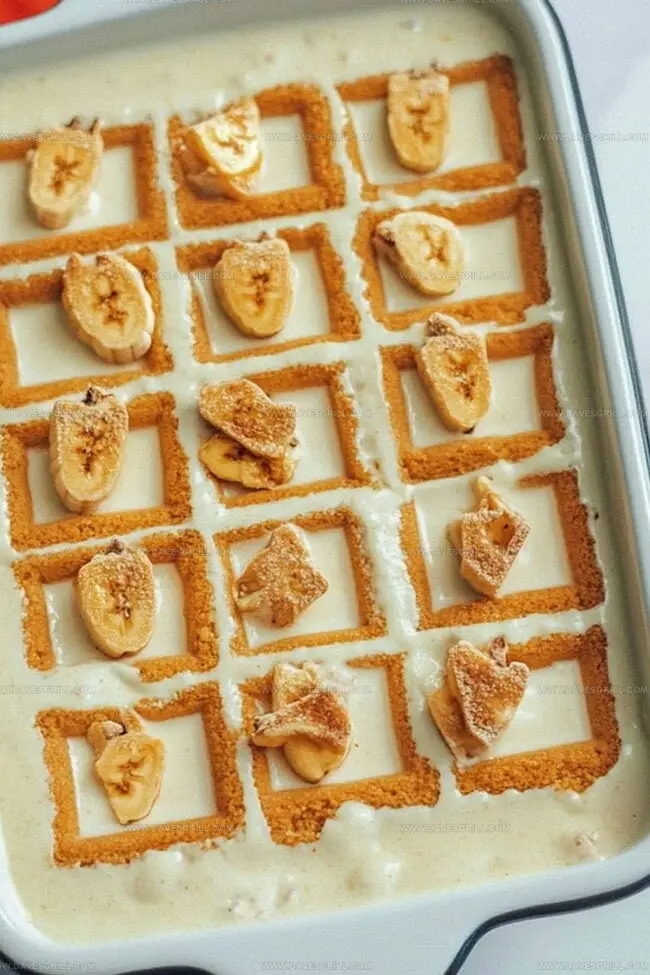
Select a 9×13-inch baking dish or elegant trifle bowl. Begin layering with:Repeat these layers until all ingredients are beautifully distributed, ensuring the final layer is pudding.
Step 5: Crown With Fluffy Topping
Spread the remaining whipped topping evenly across the surface, creating a cloud-like finish.
Step 6: Chill And Marinate
Cover the dessert and refrigerate for a minimum of 4 hours, preferably overnight. This resting period allows flavors to mingle and cookies to soften deliciously.
Step 7: Serve With Flair
Before serving, optionally garnish with extra banana slices or crushed wafers for added texture and visual appeal.
Helpful Tips For Mamas Banana Pudding
How To Store Mamas Banana Pudding
Perfect Pairings With Mamas Banana Pudding
Easy Ways To Switch Up Mamas Banana Pudding
Mamas Banana Pudding FAQs
This is a classic family recipe passed down through generations, using simple ingredients that create a nostalgic, creamy dessert that brings comfort and joy to every bite.
Absolutely! While whipped topping is convenient, homemade whipped cream works wonderfully and can make the dessert feel even more special and authentic.
Toss banana slices with a little lemon juice before layering. The citrus helps slow down oxidation and keeps the bananas looking fresh and appetizing.
Yes! This banana pudding is perfect for potlucks because it’s easy to make ahead, serves a crowd, and is always a crowd-pleaser that disappears quickly at any gathering.
Print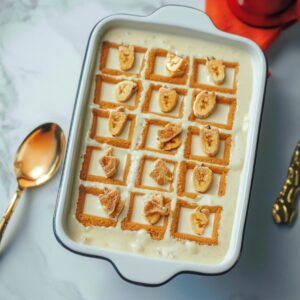
Mamas Banana Pudding Recipe
- Total Time: 20 minutes
- Yield: 12 1x
Description
Mama’s banana pudding delights with Southern charm, blending creamy layers of nostalgia and sweet comfort. Silky vanilla custard, ripe bananas, and crisp vanilla wafers create a classic dessert that connects generations around the family table.
Ingredients
Main Ingredients:
- 5.1 ounces (146 grams) instant vanilla pudding mix
- 3 cups cold milk
- 14 ounces (397 grams) sweetened condensed milk
- 45 ripe bananas, sliced
- 11 ounces (312 grams) vanilla wafers
Flavoring Ingredients:
- 1 teaspoon vanilla extract
Topping Ingredients:
- 8 ounces (227 grams) whipped topping (like Cool Whip), thawed
Instructions
- Prepare the pudding base by whisking the pudding mix and cold milk until completely smooth, allowing the mixture to set and thicken for several minutes.
- Incorporate sweetened condensed milk and vanilla extract, stirring thoroughly to create a rich, creamy foundation.
- Gently fold in a generous portion of whipped topping, creating a light and airy texture.
- Create the first foundation layer in a deep serving dish by arranging vanilla wafers to cover the bottom completely.
- Distribute a fresh layer of sliced bananas evenly over the wafer base, ensuring full coverage.
- Carefully pour a portion of the pudding mixture over the banana layer, spreading it smoothly to reach all edges.
- Repeat the layering process: wafers, bananas, and pudding mixture, building height and complexity with each successive tier.
- Complete the dessert with a final smooth layer of pudding mixture, ensuring a pristine surface.
- Crown the pudding with remaining whipped topping, spreading it delicately across the top.
- Refrigerate the dessert for a minimum of four hours, allowing flavors to meld and cookies to soften.
- Before serving, optionally garnish with additional banana slices or crushed wafers for textural contrast and visual appeal.
Notes
- Softening Tip: Allow vanilla wafers to absorb pudding’s moisture, creating a delightful cake-like texture that melts in your mouth.
- Banana Browning Prevention: Toss fresh banana slices in a little lemon juice to keep them looking fresh and prevent quick discoloration.
- Make-Ahead Magic: This dessert actually tastes better when refrigerated overnight, giving ingredients time to meld and develop deeper, richer flavors.
- Dietary Flexibility: Swap regular milk with almond or oat milk for a dairy-free version, and use gluten-free vanilla wafers to accommodate different dietary needs.
- Prep Time: 10 minutes
- Cook Time: 10 minutes
- Category: Desserts
- Method: Mixing
- Cuisine: American
Nutrition
- Serving Size: 12
- Calories: 309
- Sugar: 26 g
- Sodium: 150 mg
- Fat: 10 g
- Saturated Fat: 4 g
- Unsaturated Fat: 5 g
- Trans Fat: 0 g
- Carbohydrates: 50 g
- Fiber: 1 g
- Protein: 5 g
- Cholesterol: 15 mg
Dave Mitchell
Founder & Chief Recipe Developer
Expertise
Education
Asheville-Buncombe Technical Community College
Associate of Applied Science in Culinary Arts
Focus: Comprehensive training in culinary techniques, kitchen management, and menu planning, with a special emphasis on grilling and outdoor cooking.
Dave Mitchell is the heart behind Daves Grill, a cook, writer, and lover of all things grilled. He studied Culinary Arts at Asheville-Buncombe Technical Community College and spent years cooking, testing, and sharing recipes that actually work.
Dave started Daves Grill to keep things simple: one great recipe at a time. His food is bold, easy to follow, and made for real people with regular kitchens. From juicy steaks to quick sides, Dave’s recipes bring the heat without the hassle.