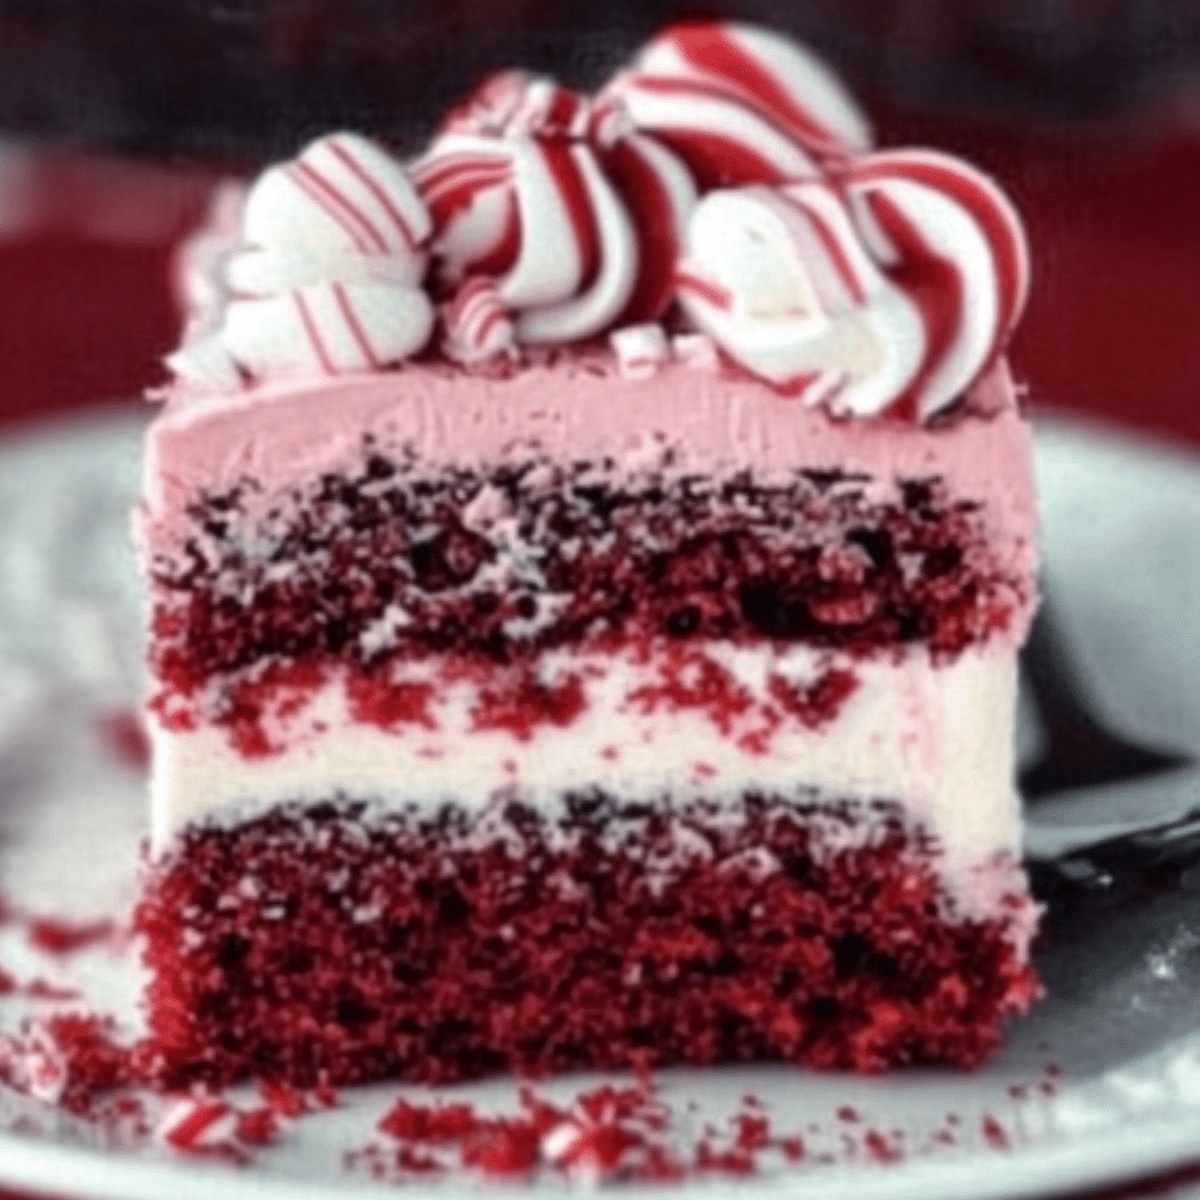
Dreamy Red Velvet Peppermint Poke Cake Recipe for the Holidays
Sweet memories dance through my kitchen whenever I whip up this red velvet peppermint poke cake that blends nostalgic comfort with holiday magic.
Festive desserts sometimes need a playful twist to capture everyone’s imagination.
Creamy peppermint touches weave between rich chocolate layers, creating a sensational seasonal treat.
Cold winter nights call for warm, indulgent experiences that spark conversation and delight.
Soft cake textures meet cool mint undertones in a symphony of flavors that sing winter’s melody.
One slice promises to transport you into a wonderland of delectable sensations.
This recipe will have guests asking for seconds before finishing their first bite.
Red Velvet Peppermint Poke Cake to Celebrate With
Baking Essentials for Peppermint Poke Cake
Main Ingredients:
Cake Base:Filling and Moisture:Topping and Decoration:Optional Add-Ins:Steps for a Festive Red Velvet Treat
Step 1: Bake the Cake
Preheat oven to 350°F. Grease a 9×13-inch baking dish. Mix red velvet cake mix according to box instructions. Pour batter into prepared dish. Bake until a toothpick comes out clean, about 25-30 minutes. Let cake cool for 10 minutes.
Step 2: Create Cake Holes
Use the handle of a wooden spoon or a skewer to poke deep holes across the entire cake surface. Ensure holes are evenly distributed for maximum flavor absorption.
Step 3: Drench with Peppermint Milk
Combine sweetened condensed milk with peppermint extract. Slowly pour the mixture over the cake, allowing it to seep into the holes. Cover and refrigerate for at least one hour to let flavors meld.
Step 4: Whip Creamy Topping
In a chilled mixing bowl, whip heavy cream until soft peaks form. Add:Continue whipping until stiff peaks develop. Optional: Swirl in a few drops of red food coloring for a festive marbled look.
Step 5: Finish with Flair
Spread whipped topping evenly across the cake. Sprinkle generously with:Step 6: Serve and Delight
Slice the cake chilled. Enjoy with a steaming mug of hot cocoa or coffee for the ultimate winter treat.
Peppermint Tips That Boost Flavor
How to Chill and Store This Cake
Toppings That Work with Red Velvet Peppermint
New Spins on a Holiday Favorite
Print
Red Velvet Peppermint Poke Cake Recipe
- Total Time: 45 minutes
- Yield: 12 1x
Description
Festive red velvet peppermint poke cake brings holiday cheer to dessert tables with its rich, minty layers. Creamy peppermint frosting and chocolate drizzle create an irresistible winter wonderland that delights guests with each delectable bite.
Ingredients
Cake Base:
- 1 box red velvet cake mix
- 3 eggs
- ⅓ cup vegetable oil
- 1 cup water
Filling and Topping Ingredients:
- 1 cup sweetened condensed milk
- 1 teaspoon (1 tsp) peppermint extract
- 2 cups heavy whipping cream
- 2 tablespoons (2 tbsp) powdered sugar
- ½ teaspoon (½ tsp) peppermint extract
- Red food coloring (optional)
- Crushed peppermint candies
- Shaved white chocolate (optional)
- Shaved dark chocolate (optional)
Decorative Ingredients:
- Crushed candy canes
- Shaved white chocolate (optional)
- Shaved dark chocolate (optional)
Instructions
- Preheat the oven to 180°C (350°F) and thoroughly grease a 9×13-inch baking dish, ensuring complete coverage to prevent sticking.
- Prepare the red velvet cake batter following the box mix instructions, mixing until smooth and vibrant red.
- Transfer the batter into the prepared baking dish, spreading evenly with a spatula to create a level surface.
- Bake the cake according to package directions, typically 25–30 minutes, until a toothpick inserted in the center comes out clean.
- Remove from the oven and let the cake rest for 10 minutes to slightly cool and stabilize.
- Using the handle of a wooden spoon or a skewer, systematically create uniform holes across the entire cake surface, ensuring even absorption of subsequent layers.
- Combine sweetened condensed milk with peppermint extract, whisking until thoroughly integrated.
- Slowly drizzle the peppermint-infused milk over the cake, making sure the liquid penetrates each carefully created hole.
- Refrigerate the cake for a minimum of 1 hour, allowing the milk to completely saturate and cool the dessert.
- Whip heavy cream in a chilled bowl using an electric mixer, gradually increasing speed until soft peaks form.
- Gradually incorporate powdered sugar and additional peppermint extract, continuing to whip until stiff, glossy peaks develop.
- Optional: Create a festive marbled effect by gently folding a few drops of red food coloring into the whipped cream, maintaining delicate swirls.
- Carefully spread the peppermint whipped cream across the entire cake surface, ensuring complete and even coverage.
- Garnish generously with crushed peppermint candies and delicate chocolate shavings for a decorative and flavorful finish.
- Chill the cake thoroughly before serving, and accompany with a warm beverage like hot cocoa or coffee for a delightful contrast.
Notes
- Customize the cake mix by using gluten-free or dairy-free alternatives to accommodate dietary restrictions.
- Control the peppermint intensity by adjusting the extract amount, ensuring a balanced flavor that doesn’t overpower the cake.
- Enhance the cake’s moisture by adding a tablespoon of sour cream or Greek yogurt to the box mix for extra richness and softness.
- Transform the dessert into individual servings by preparing the cake in a muffin tin or small ramekins for easy portion control and elegant presentation.
- Prep Time: 15 minutes
- Cook Time: 30 minutes
- Category: Desserts
- Method: Baking
- Cuisine: American
Nutrition
- Serving Size: 12
- Calories: 320
- Sugar: 22 g
- Sodium: 250 mg
- Fat: 18 g
- Saturated Fat: 10 g
- Unsaturated Fat: 6 g
- Trans Fat: 0 g
- Carbohydrates: 36 g
- Fiber: 0 g
- Protein: 4 g
- Cholesterol: 50 mg
Dave Mitchell
Founder & Chief Recipe Developer
Expertise
Education
Asheville-Buncombe Technical Community College
Associate of Applied Science in Culinary Arts
Focus: Comprehensive training in culinary techniques, kitchen management, and menu planning, with a special emphasis on grilling and outdoor cooking.
Dave Mitchell is the heart behind Daves Grill, a cook, writer, and lover of all things grilled. He studied Culinary Arts at Asheville-Buncombe Technical Community College and spent years cooking, testing, and sharing recipes that actually work.
Dave started Daves Grill to keep things simple: one great recipe at a time. His food is bold, easy to follow, and made for real people with regular kitchens. From juicy steaks to quick sides, Dave’s recipes bring the heat without the hassle.