Classic 7-Minute Frosting Recipe to Top Cakes
Sweet baking adventures come alive with this classic 7 minute frosting that delivers creamy, cloud-like perfection.
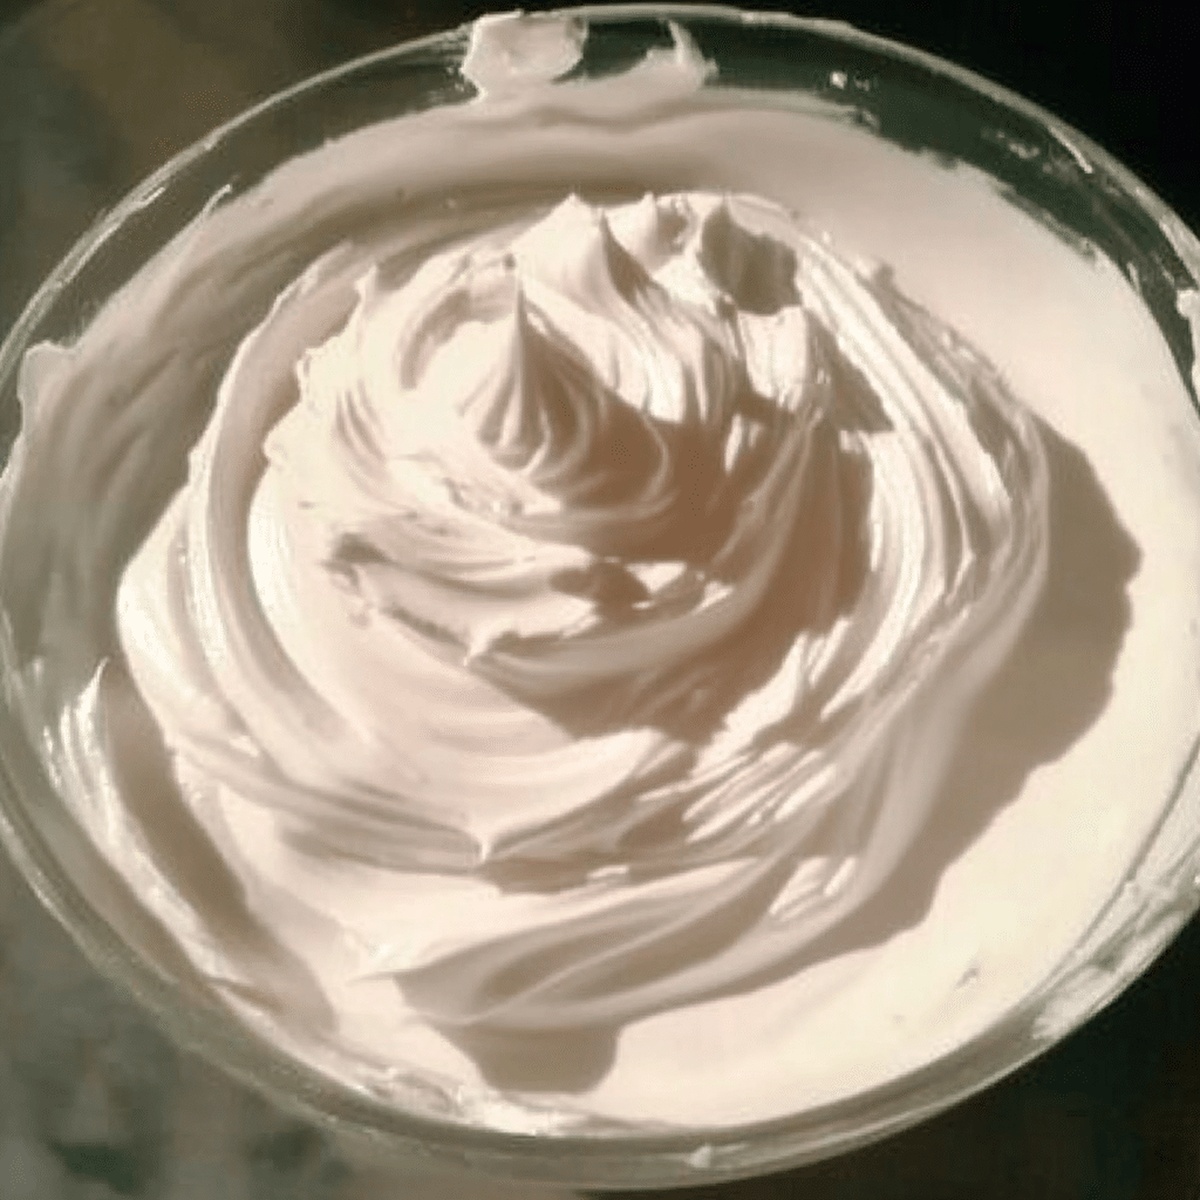
Whipping up this silky 7 minute frosting requires just a few simple ingredients and minimal effort.
Professional and home bakers alike adore this light, glossy topping that transforms ordinary cakes into extraordinary desserts.
The magic happens when egg whites, sugar, and a touch of cream of tartar dance together over gentle heat.
Each smooth, billowy spoonful promises a dreamy texture that melts beautifully on your tongue.
This recipe delivers restaurant-quality results without complicated techniques or expensive equipment.
You won’t believe how easy it is to create such an elegant, decadent frosting in mere minutes.
Prepare to elevate your next cake with this irresistible, marshmallow-like masterpiece that’s sure to impress.
Quick Recipe Overview

7-Minute Frosting Ingredient Rundown
For Base Ingredients:For Stabilizing Ingredients:For Finishing Ingredient:Tools for This Fluffy, Old-School Frosting
Whip Up a Meringue-Style Topping with Shine

Fill a pot with water and heat until simmering. Select a heatproof bowl that fits comfortably over the pot without touching water. Mix egg whites, sugar, water, cream of tartar, and salt directly in this bowl.
Position the bowl over simmering water. Beat ingredients using a handheld mixer on medium speed for 4-5 minutes. Continue until sugar completely dissolves and mixture reaches a warm temperature around 160°F.
Remove bowl from heat source. Switch mixer to high speed and beat vigorously for 5-7 minutes. Watch for glossy, stiff peaks that hold their shape, indicating perfect frosting consistency.
Quickly incorporate vanilla extract by briefly mixing until evenly blended.
Spread frosting onto cakes or cupcakes right away. The mixture will begin to set and firm up as it cools, so work swiftly for best results.
Tips to Nail the Timing and Temperature
Serve on Cupcakes, Cakes, or Pie
Store Covered to Keep Its Texture Light
FAQs
This frosting is a classic marshmallow-like topping made by whisking egg whites and sugar over heat, creating a light, fluffy, and glossy texture that’s less sweet than traditional buttercream.
While it requires some technique, the process is straightforward. The key is maintaining a consistent whisking motion and watching the temperature to ensure smooth, stable peaks.
Yes, you can use a handheld electric mixer or even whisk by hand, though it will require more arm strength and consistent whisking to achieve the right consistency.
It’s best used immediately after making, as it starts to set quickly and can become less smooth over time. It’s perfect for cakes that will be served the same day.
Print
Silky 7 Minute Frosting Recipe
- Total Time: 12 minutes
- Yield: 9 1x
Description
Classic Old-Fashioned 7 Minute Frosting brings nostalgia to dessert tables with its cloud-like marshmallow texture. Home bakers can whip this simple yet elegant topping quickly for cakes and cupcakes.
Ingredients
- 2 large egg whites (room temperature)
- 1 ½ cups (340 grams) granulated sugar
- ¼ cup (60 ml/2 fl oz) water
- ¼ tsp cream of tartar
- ¼ tsp salt
- 1 tsp vanilla extract
Instructions
- Preparation: Create a double boiler by positioning a heatproof mixing bowl over a pot of gently simmering water, ensuring the water doesn’t make direct contact with the bowl’s bottom.
- Mixture Creation: Blend egg whites, sugar, water, cream of tartar, and salt in the bowl, whisking to form a uniform initial mixture.
- Heating Process: Continuously whisk the ingredients over simmering water, using a handheld mixer to dissolve sugar and maintain consistent temperature, gradually bringing the mixture to 160°F (about 4-5 minutes).
- Transformation Stage: Transfer the heated mixture to a stand mixer or continue with a handheld mixer, whipping at high speed to dramatically increase volume and develop a glossy, marshmallow-like texture.
- Peak Formation: Continue beating vigorously until the frosting forms stiff, lustrous peaks that maintain their dramatic shape, typically requiring 5-7 minutes of intense mixing.
- Flavor Finishing: Fold in vanilla extract with a quick, gentle blend to ensure even distribution throughout the ethereal, cloud-like frosting.
- Immediate Application: Use the frosting promptly, as it will begin to set and lose its luxurious, pillowy consistency as it cools, spreading smoothly over cakes, cupcakes, or other delectable baked creations.
Notes
- Prevent Sugar Crystallization: Continuously whisk ingredients to ensure smooth sugar dissolution and avoid grainy texture.
- Temperature Precision: Use a reliable candy thermometer to accurately reach 160°F, which guarantees food safety and proper protein coagulation.
- Immediate Application: Spread frosting quickly after preparing, as it sets rapidly and becomes challenging to manipulate when cooling down.
- Equipment Selection: Choose a clean, grease-free mixing bowl to help egg whites achieve maximum volume and stability during whipping process.
- Prep Time: 5 minutes
- Cook Time: 7 minutes
- Category: Desserts
- Method: Steaming
- Cuisine: American
Nutrition
- Serving Size: 9
- Calories: 92
- Sugar: 37.8 g
- Sodium: 74 mg
- Fat: 0 g
- Saturated Fat: 0 g
- Unsaturated Fat: 0 g
- Trans Fat: 0 g
- Carbohydrates: 23.5 g
- Fiber: 0 g
- Protein: 2.3 g
- Cholesterol: 0 mg
Emily Lawson
Content Creator & Culinary Specialist
Expertise
Education
Oregon Culinary Institute
Diploma in Culinary Arts
Focus: Emphasis on farm-to-table cooking, sustainable practices, and the fusion of global flavors with traditional grilling methods.
Emily Lawson is the content creator at Daves Grill, turning tasty ideas into clear, easy recipes. Based in Portland, she trained at the Oregon Culinary Institute and loves cooking with fresh, seasonal ingredients, especially grilled veggies and global flavors.
Emily mixes food writing with hands-on cooking to bring you recipes that feel fun, not stressful. Her goal is to make every dish simple, flavorful, and worth coming back to. Together, she and Dave serve up real food, one recipe at a time.