
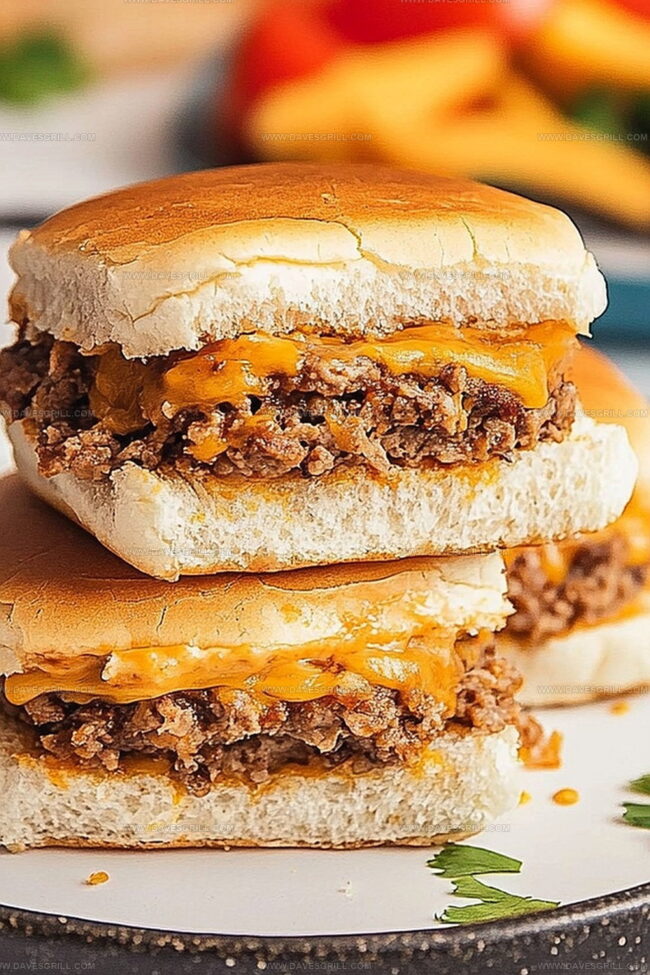
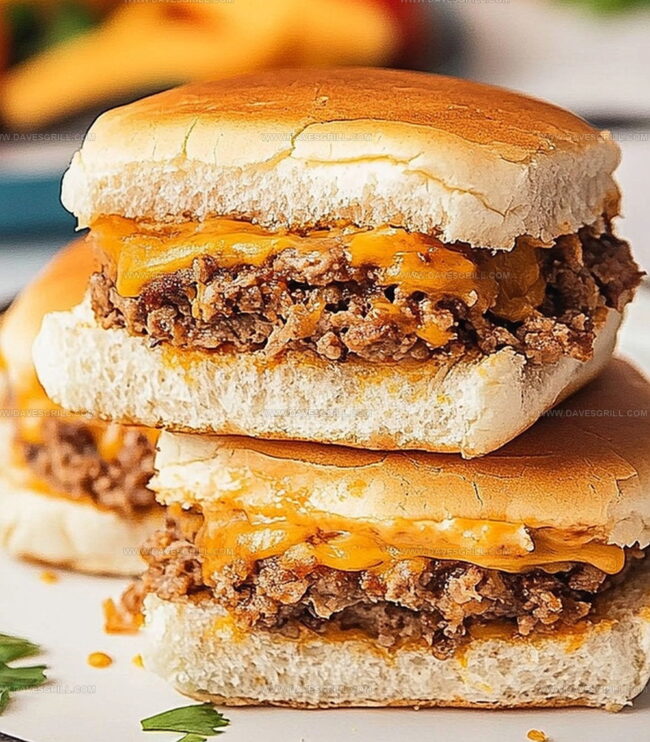
Sweet & Zesty Taco Sliders Recipe: A Bite-Sized Fiesta!
Crispy, bite-sized taco sliders offer a playful twist on traditional Mexican-inspired appetizers that dance across your plate.
Small sandwiches pack incredible flavor in every miniature bite.
These cute little handheld treats combine zesty spices with tender meat and fresh ingredients.
Guests always go crazy when these arrive at parties or game nights.
Each slider becomes a compact flavor explosion that feels both familiar and exciting.
Quick to assemble and even faster to devour, these mini sandwiches guarantee smiles around the table.
Why Taco Sliders Are Bite-Sized Goodness
What You’ll Need For Taco Sliders
Meat and Protein:Bread and Base:Dairy and Cheese:Toppings and Garnish:Water:How To Cook Taco Sliders The Easy Way
Step 1: Warm Up the Kitchen
Preheat the oven to 350 degrees Fahrenheit or 175 degrees Celsius. Get your baking dish ready for the slider magic.
Step 2: Brown the Beef
Heat a skillet over medium flame. Drop in the ground beef and cook until it transforms into a golden-brown delight. Drain away any extra fat to keep things light and tasty.
Step 3: Spice It Up
Sprinkle in the taco seasoning and splash some water into the skillet. Let the mixture simmer and dance for about 5 minutes until it thickens into a rich, flavorful sauce.
Step 4: Prepare the Slider Base
Gently slice the slider buns in half horizontally. Arrange the bottom halves in your baking dish, creating a cozy foundation for the upcoming flavor explosion.
Step 5: Layer the Meat
Spread the sizzling taco meat evenly across the bun bottoms. Ensure every inch gets a generous coating of meaty goodness.
Step 6: Cheese Please
Shower the meat with a blanket of shredded cheese. Let it promise a melty, gooey experience.
Step 7: Add Fresh Toppings
Sprinkle on your favorite fresh ingredients:(You can add these fresh after baking or bake them along with the sliders)
Step 8: Crown the Sliders
Place the top bun halves over the toppings, creating little flavor-packed sandwiches.
Step 9: Butter and Garlic Glaze
Mix melted butter with garlic powder. Lovingly brush this aromatic mixture over the slider tops, promising a golden, crispy finish.
Step 10: Bake to Perfection
Slide the baking dish into the preheated oven. Bake for 10-15 minutes until the cheese melts into a dreamy pool and the bun tops turn a gorgeous golden brown.
Serve hot and watch everyone dive into these irresistible taco sliders!
Top Tips For Flavorful Taco Sliders
How To Store Taco Sliders Right
Tasty Side Ideas For Taco Sliders
Ways To Mix Up Taco Sliders
Taco Sliders FAQ Roundup
These sliders combine the classic taco flavors with a baked sandwich concept, creating a delicious handheld meal that’s perfect for parties or quick dinners. They’re easier to eat and have a crispy, buttery bun that traditional tacos don’t offer.
Yes! You can prepare the sliders and assemble them completely before baking. Cover them with foil and refrigerate for up to 4 hours before popping them in the oven. This makes them great for meal prep or entertaining.
The spice level depends on the taco seasoning you use. If you want a milder version, choose a mild taco seasoning or reduce the amount. For extra heat, pick a spicy seasoning or add some hot sauce after baking.
Absolutely! Ground turkey is a great lean alternative to beef. Just make sure to cook it thoroughly and drain any excess liquid to keep the sliders from getting soggy.
Print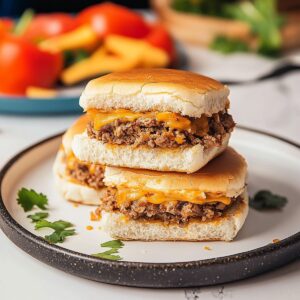
Taco Sliders Recipe
- Total Time: 30 minutes
- Yield: 6 1x
Description
Mexican fiesta meets mini delights in these irresistible taco sliders, packed with zesty flavors and perfect for casual gatherings. Small bread rolls embrace spicy ground beef, melted cheese, and fresh toppings, promising a mouthwatering experience you’ll crave again and again.
Ingredients
Meat and Protein:
- 1 pound (454 grams) ground beef
- 1 packet taco seasoning mix (or 2 tablespoons homemade)
Bread and Dairy:
- 12 slider buns or Hawaiian rolls
- 1 cup shredded cheddar cheese
- 2 tablespoons butter, melted
- ¼ cup sour cream (optional)
Vegetables and Garnishes:
- ½ cup water
- ½ cup diced tomatoes
- ½ cup shredded lettuce
- ¼ cup diced red onion
- ¼ cup salsa (optional)
- 1 teaspoon garlic powder
- Fresh cilantro for garnish (optional)
Instructions
- Warm the oven to a moderate temperature, preparing it for the slider assembly.
- Sauté ground beef in a skillet, breaking it into small crumbles until fully cooked and no longer pink.
- Drain any accumulated fat from the meat, then infuse with zesty taco seasoning and a splash of liquid, allowing the mixture to simmer and thicken.
- Gently separate slider buns into top and bottom halves, creating a stable base in a prepared baking dish.
- Distribute the savory seasoned meat evenly across the bottom bun layer, creating a uniform meat foundation.
- Generously cascade shredded cheese over the meat, ensuring complete coverage.
- Scatter fresh, crisp diced tomatoes, shredded lettuce, and finely chopped onions across the cheese layer.
- Crown the layered sliders with the top bun halves, creating compact mini sandwiches.
- Whisk melted butter with aromatic garlic powder, then delicately brush the mixture over the exposed bun surfaces.
- Slide the assembled sliders into the preheated oven, baking until the cheese melts and bun tops transform into a golden, appetizing shade.
Notes
- Customize meat choices by substituting ground beef with ground turkey, chicken, or plant-based crumbles for dietary preferences.
- Prep taco meat mixture ahead of time and refrigerate for quick weeknight assembly, ensuring flavors develop and meld together.
- Control spice levels by adjusting taco seasoning or using mild versions for kid-friendly meals.
- Layer additional toppings like jalapeños, sour cream, or guacamole after baking for extra freshness and texture contrast.
- Prep Time: 10 minutes
- Cook Time: 20 minutes
- Category: Lunch, Dinner, Appetizer, Snacks
- Method: Baking
- Cuisine: Mexican
Nutrition
- Serving Size: 6
- Calories: 389
- Sugar: 2 g
- Sodium: 680 mg
- Fat: 22 g
- Saturated Fat: 10 g
- Unsaturated Fat: 9 g
- Trans Fat: 1 g
- Carbohydrates: 30 g
- Fiber: 1 g
- Protein: 18 g
- Cholesterol: 65 mg
Dave Mitchell
Founder & Chief Recipe Developer
Expertise
Education
Asheville-Buncombe Technical Community College
Associate of Applied Science in Culinary Arts
Focus: Comprehensive training in culinary techniques, kitchen management, and menu planning, with a special emphasis on grilling and outdoor cooking.
Dave Mitchell is the heart behind Daves Grill, a cook, writer, and lover of all things grilled. He studied Culinary Arts at Asheville-Buncombe Technical Community College and spent years cooking, testing, and sharing recipes that actually work.
Dave started Daves Grill to keep things simple: one great recipe at a time. His food is bold, easy to follow, and made for real people with regular kitchens. From juicy steaks to quick sides, Dave’s recipes bring the heat without the hassle.