Dreamy Red Velvet Cheesecake Bites Recipe: Bite-sized Joy!
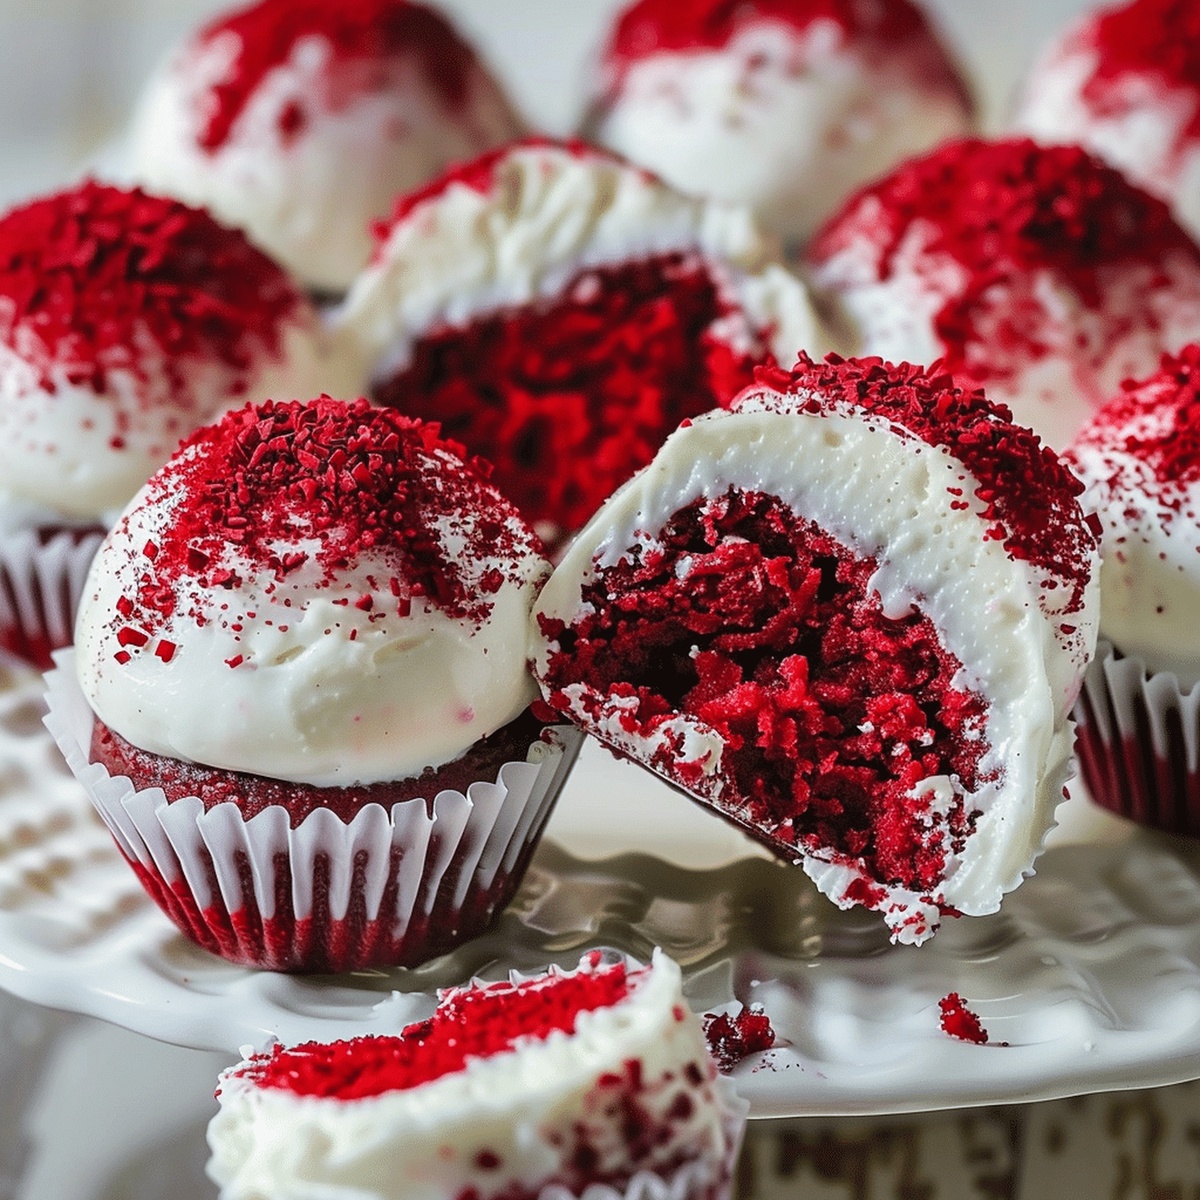
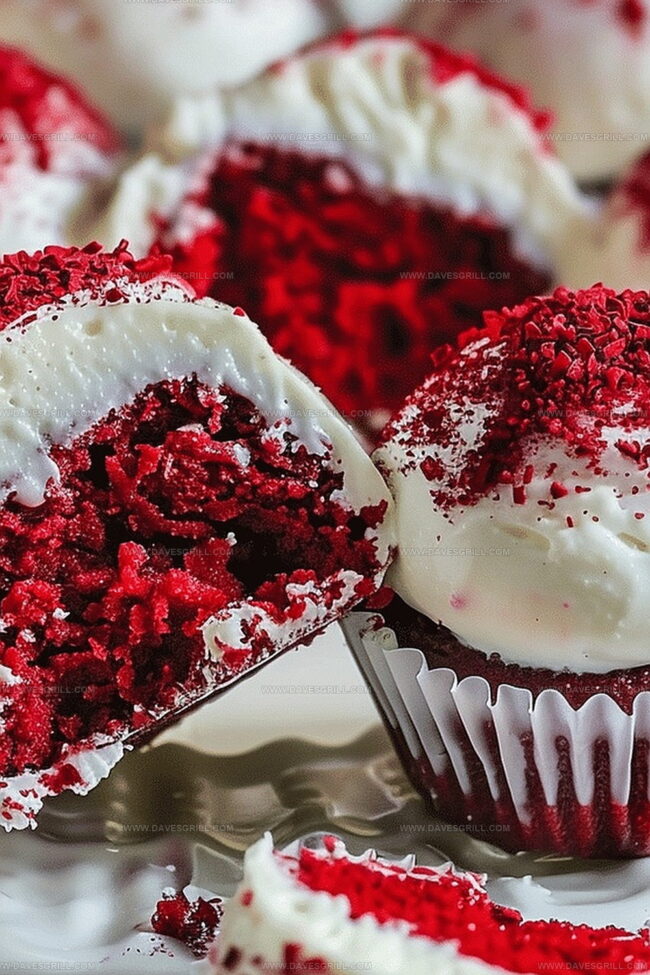
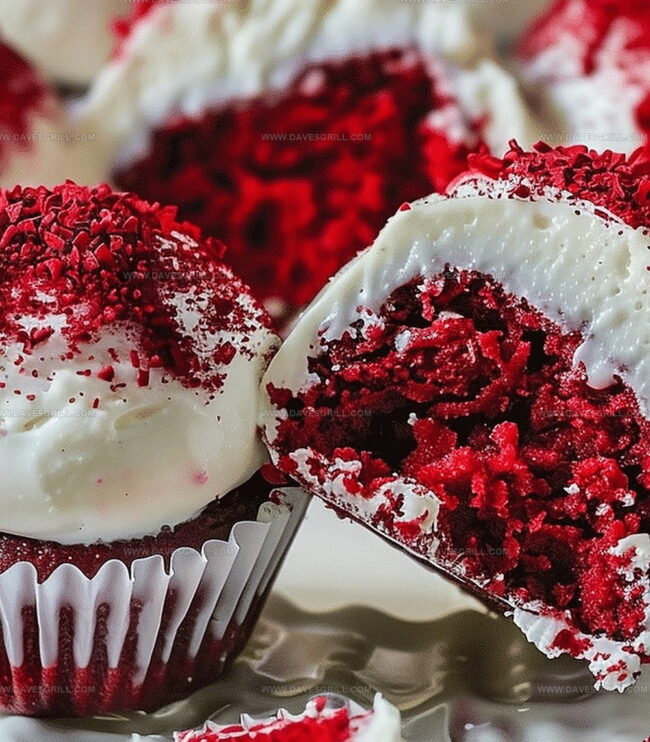
Delectable red velvet cheesecake bites dance between decadence and pure indulgence.
Creamy cheese and rich cocoa meld into a luxurious dessert that tempts every sweet tooth.
The contrast of smooth cream cheese and silky red velvet creates a harmonious blend of flavors.
These elegant miniature treats promise a delightful experience with each bite-sized morsel.
Soft, velvety textures combine with a deep crimson color that makes these cheesecake bites visually stunning.
Professional bakers and home cooks alike will adore the simplicity of this recipe.
Prepare to impress and delight with these irresistible red velvet cheesecake bites that elevate any gathering or personal dessert moment.
Quick Recipe Overview
Red Velvet Cheesecake Bite Ingredient List
For The Crust:For The Cheesecake Filling:For Garnish:Tools You’ll Need for Red Velvet Perfection
Bake Red Velvet Cheesecake Bites at Home
Warm up your oven to a cozy 325F. Grab a muffin tin and line it with cute paper cups. Crush some red velvet cake into fine crumbs and mix with melted butter until it feels like wet sand. Press a spoonful into each cup, creating a delicious foundation.
Grab your mixer and beat cream cheese until silky smooth. Blend in sugar and vanilla, creating a dreamy mixture. Stir in sour cream, making everything ultra-creamy. Gently add eggs one by one, keeping the texture light. Mix cocoa with milk, then swirl into the cream cheese. Add a splash of red food coloring to make it pop with vibrant color.
Pour the luscious filling over each crumb base, almost to the top. Slide the tray into the oven and bake for 20-25 minutes. You’ll know they’re ready when edges look set but centers still have a gentle wiggle. Let them rest in the pan for 10 minutes, then transfer to a cooling rack. Chill in the refrigerator for a couple of hours to firm up perfectly.
Right before serving, crown each mini cheesecake with a fluffy cloud of whipped cream. Sprinkle some extra red velvet crumbs on top for a stunning finish. Enjoy your decadent, bite-sized treats!
Tips to Personalize Cheesecake Bites
Present Cheesecake Bites That Impress
Store and Serve Red Velvet Bites Easily
Print
Velvety Red Velvet Cheesecake Bites Recipe
- Total Time: 45 minutes
- Yield: 13 1x
Description
Red velvet cheesecake bites showcase creamy indulgence with classic Southern charm. Rich chocolate notes and tangy cream cheese create irresistible miniature desserts you cannot resist.
Ingredients
- 8 oz (226 g) cream cheese, softened
- ½ cup (100 g) granulated sugar
- 2 large eggs
- ½ cup (120 ml) sour cream
- 1 tsp vanilla extract
- 1 ½ cups (354 ml) red velvet cake crumbs
- ¼ cup (57 g) unsalted butter, melted
- ¼ cup (30 g) cocoa powder
- ¼ cup (60 ml) milk
- Red food coloring (as needed)
- Whipped cream
- Extra red velvet cake crumbs
Instructions
- Crust Creation: Pulverize red velvet cake into fine crumbs, blend with melted butter, and press firmly into paper-lined muffin cavities, creating a robust foundation.
- Cheesecake Base: Whip cream cheese until ultra-smooth, gradually integrate sugar and vanilla, then fold in sour cream to achieve a luxurious, silky consistency.
- Flavor Infusion: Dissolve cocoa powder in milk, blend with eggs, and incorporate vibrant red food coloring to transform the mixture into a rich, crimson batter.
- Filling Technique: Gently ladle the velvety mixture into prepared crusts, filling each cavity almost to the brim, ensuring even distribution and minimal air pockets.
- Baking Process: Place in a preheated oven at 325°F, baking until edges firm up and centers maintain a subtle jiggle, approximately 20-25 minutes.
- Cooling Strategy: Remove from oven and allow to cool within the baking pan, then transfer to a cooling rack to release residual heat and prevent overcooking.
- Finishing Touch: Refrigerate for at least 2 hours to solidify and develop flavor, then garnish with a delicate whipped cream swirl and sprinkle of reserved red velvet crumbs.
Notes
- Crumb Consistency Control: Pulse red velvet cake into ultra-fine, uniform crumbs to ensure a compact, stable crust that holds together perfectly when bitten.
- Temperature Precision: Use room-temperature cream cheese and eggs to prevent lumpy batter and guarantee a smooth, silky cheesecake texture.
- Gentle Mixing Technique: Fold ingredients gently to avoid overworking the batter, which can lead to dense, tough cheesecake bites with potential cracks.
- Color Enhancement Trick: Dissolve cocoa powder completely in milk before adding food coloring to achieve a deep, vibrant red hue without clumping.
- Prep Time: 20 minutes
- Cook Time: 25 minutes
- Category: Desserts, Snacks
- Method: Baking
- Cuisine: American
Nutrition
- Serving Size: 13
- Calories: 205
- Sugar: 12 g
- Sodium: 150 mg
- Fat: 10 g
- Saturated Fat: 6 g
- Unsaturated Fat: 4 g
- Trans Fat: 0 g
- Carbohydrates: 24 g
- Fiber: 1 g
- Protein: 3 g
- Cholesterol: 40 mg
Emily Lawson
Content Creator & Culinary Specialist
Expertise
Education
Oregon Culinary Institute
Diploma in Culinary Arts
Focus: Emphasis on farm-to-table cooking, sustainable practices, and the fusion of global flavors with traditional grilling methods.
Emily Lawson is the content creator at Daves Grill, turning tasty ideas into clear, easy recipes. Based in Portland, she trained at the Oregon Culinary Institute and loves cooking with fresh, seasonal ingredients, especially grilled veggies and global flavors.
Emily mixes food writing with hands-on cooking to bring you recipes that feel fun, not stressful. Her goal is to make every dish simple, flavorful, and worth coming back to. Together, she and Dave serve up real food, one recipe at a time.