
Dreamy Silky Chocolate Pie Recipe: Heavenly Dessert Magic
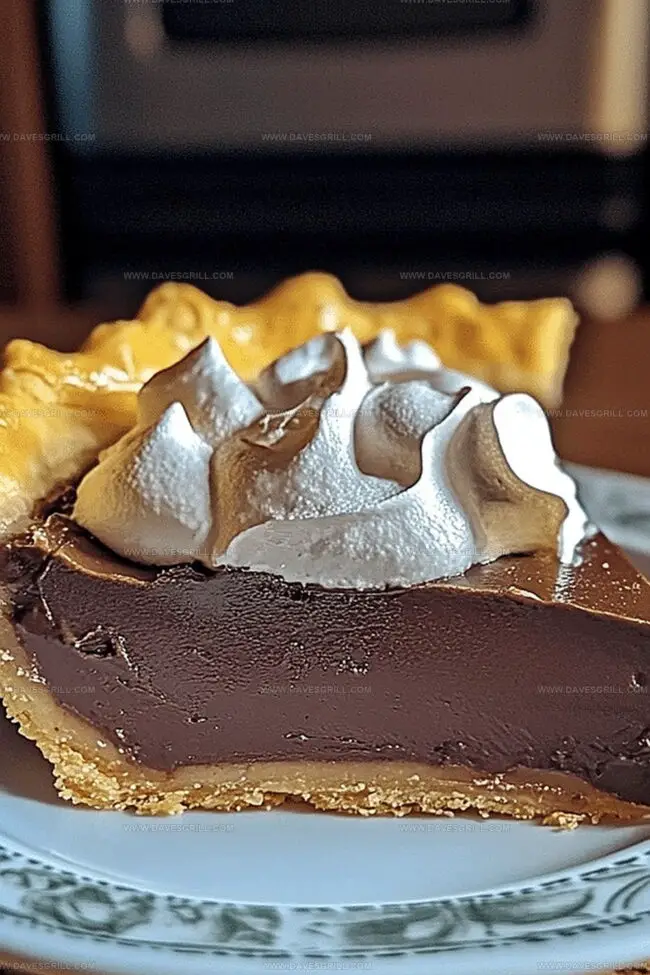
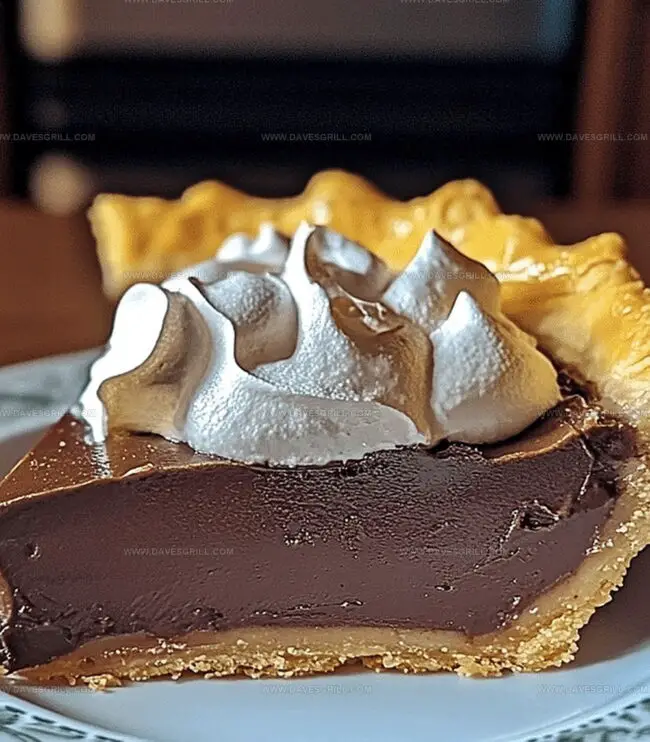
Decadent desserts have a magical way of making any meal special, and this rich chocolate pie with its velvety chocolate mousse filling strikes pure deliciousness.
Chocolate lovers know the allure of a smooth, creamy pie that melts in your mouth.
Every forkful promises an indulgent experience that dances between sweet and luxurious.
The recipe combines simple ingredients with expert techniques to create a show-stopping dessert.
Crisp graham cracker crust provides the perfect foundation for the luscious chocolate filling.
A dollop of whipped cream on top adds an elegant finishing touch that elevates this classic treat.
Quick Recipe Overview
What Goes into Old Fashioned Chocolate Pie
For Pie Crust:For Chocolate Filling:For Topping:Tools You’ll Need for Old Fashioned Chocolate Pie
How to Bake the Old Fashioned Chocolate Pie
Crank the oven to a toasty 375F to get ready for your delicious chocolate pie adventure.
Gently roll out your pie dough and tuck it into a 9-inch pie pan, creating beautiful ruffled edges with your fingertips.
Poke tiny holes across the bottom of the crust using a fork. Cover with parchment paper and sprinkle pie weights or dried beans to keep the crust flat and prevent bubbling.
Pop the crust into the oven for 12-15 minutes until it turns a delicate golden color. Remove the weights and let it bake for an additional 5 minutes, creating a crispy, flaky foundation for your chocolate masterpiece.
Allow the crust to cool completely, setting the stage for your rich, creamy chocolate filling.
Pro Tips for Old Fashioned Chocolate Pie Perfection
Serving Up Old Fashioned Chocolate Pie
Keeping Old Fashioned Chocolate Pie Fresh
FAQs
Look for a light golden-brown color and a dry, crisp texture. When you remove the pie weights, the crust should appear evenly colored and not appear raw or doughy in any spots.
Pie weights prevent the crust from puffing up or shrinking during baking by keeping the pastry flat and maintaining its shape. They ensure an even, smooth base for your chocolate pie filling.
Yes, you can substitute pie weights with dried beans, uncooked rice, or even granulated sugar. These alternatives help weigh down the crust during the initial baking stage to prevent bubbling and maintain the crust’s structure.
Pricking the crust with a fork creates small holes that allow steam to escape during baking. This prevents the crust from puffing up and helps it bake evenly, resulting in a flat, crisp base for your chocolate pie.
Print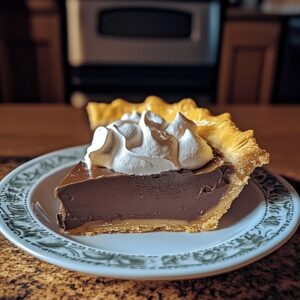
Silky Chocolate Pie Recipe
- Total Time: 45 minutes
- Yield: 9 1x
Description
Rich Old Fashioned Chocolate Pie celebrates Southern comfort with silky chocolate filling and flaky crust. Homemade whipped cream and chocolate shavings complete this classic dessert you’ll want to savor slowly.
Ingredients
- 1 pre-made pie crust
- 3 cups (720 ml) whole milk
- 1 cup (200 g) granulated sugar
- 4 large egg yolks
- ¼ cup (30 g) all-purpose flour
- 3 tbsps unsweetened cocoa powder
- ¼ tsp salt
- 2 tbsps unsalted butter
- 1 tsp vanilla extract
- Whipped cream or meringue (optional)
Instructions
- Pie Crust Preparation: Position the oven rack centrally and preheat to 375F (190C). Gently transfer the pie dough into a 9-inch pie pan, minimizing stretching and carefully crimping the edges with fingertips or fork for an elegant finish.
- Crust Baking Technique: Pierce the bottom of the dough with fork holes to prevent air bubbles. Cover completely with parchment paper and fill with ceramic weights or dried beans, ensuring even distribution to maintain the crust’s structural integrity.
- Initial Baking Phase: Bake the weighted crust for 12-15 minutes until edges turn a delicate golden color. Remove weights and parchment, then return to the oven for an additional 5 minutes to create a uniformly crisp texture.
- Cooling Process: Remove the pie crust from the oven and allow it to cool thoroughly on a wire rack, preparing the surface for the rich chocolate filling to be added subsequently.
Notes
- Prevent Crust Shrinkage: Fork-pierce the bottom and sides to reduce potential shrinking during baking, ensuring a stable pie shell.
- Master Even Baking: Center the oven rack and rotate the pie halfway through blind baking for consistent golden-brown coloration.
- Protect Delicate Edges: Gently cover crust edges with aluminum foil if browning too quickly, maintaining a perfect uniform color.
- Weight Distribution Matters: Spread ceramic weights or dried beans evenly across the entire bottom surface to prevent uneven rising and maintain structural integrity.
- Prep Time: 15 minutes
- Cook Time: 30 minutes
- Category: Desserts
- Method: Baking
- Cuisine: American
Nutrition
- Serving Size: 9
- Calories: 400
- Sugar: 22 g
- Sodium: 150 mg
- Fat: 18 g
- Saturated Fat: 10 g
- Unsaturated Fat: 6 g
- Trans Fat: 0 g
- Carbohydrates: 53 g
- Fiber: 1 g
- Protein: 6 g
- Cholesterol: 130 mg
Emily Lawson
Content Creator & Culinary Specialist
Expertise
Education
Oregon Culinary Institute
Diploma in Culinary Arts
Focus: Emphasis on farm-to-table cooking, sustainable practices, and the fusion of global flavors with traditional grilling methods.
Emily Lawson is the content creator at Daves Grill, turning tasty ideas into clear, easy recipes. Based in Portland, she trained at the Oregon Culinary Institute and loves cooking with fresh, seasonal ingredients, especially grilled veggies and global flavors.
Emily mixes food writing with hands-on cooking to bring you recipes that feel fun, not stressful. Her goal is to make every dish simple, flavorful, and worth coming back to. Together, she and Dave serve up real food, one recipe at a time.